

Introduction
Visual scripting in Unity is a game-changer for many developers, particularly those who aren’t proficient in traditional coding. It allows you to create complex game logic using a graphical interface, making game development more accessible and intuitive. Let’s dive into how you can leverage this powerful tool in Unity.
What is Visual Scripting in Unity?
Visual scripting is a method of creating game mechanics and interactions without writing code. Instead, it uses a graphical interface where you connect nodes representing different functions and logic. This approach can speed up the development process and make it more approachable for beginners.
Benefits of Using Visual Scripting:
- No Coding Required: Perfect for non-programmers.
- Faster Prototyping: Quickly test ideas without writing code.
- Visual Debugging: Easier to trace logic and fix issues.
Setting Up Visual Scripting in Unity

Prerequisites:
- Unity Hub installed
- Unity version 2021.1 or later
Step-by-Step Installation Guide:
- Open Unity Hub and create a new project.
- Choose the 2D or 3D template based on your needs.
- Go to the Unity Asset Store and search for “Visual Scripting.”
- Download and install the Visual Scripting package.
- Open the Package Manager (Window > Package Manager) and ensure Visual Scripting is installed.
Opening Visual Scripting in Unity

Navigating the Unity Interface:
- Open Unity Editor and load your project.
- Go to the Window menu and select “Visual Scripting.”
Accessing Visual Scripting Tools:
- Create a new Visual Script by right-clicking in the Project window.
- Select Create > Visual Script and name your script.
- Open the Visual Scripting Graph by double-clicking the script file.
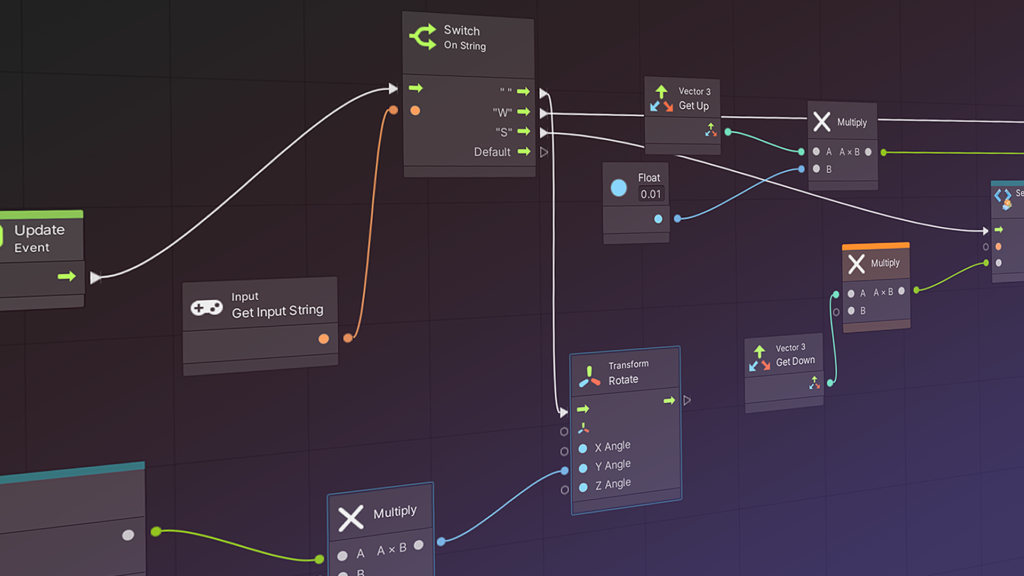
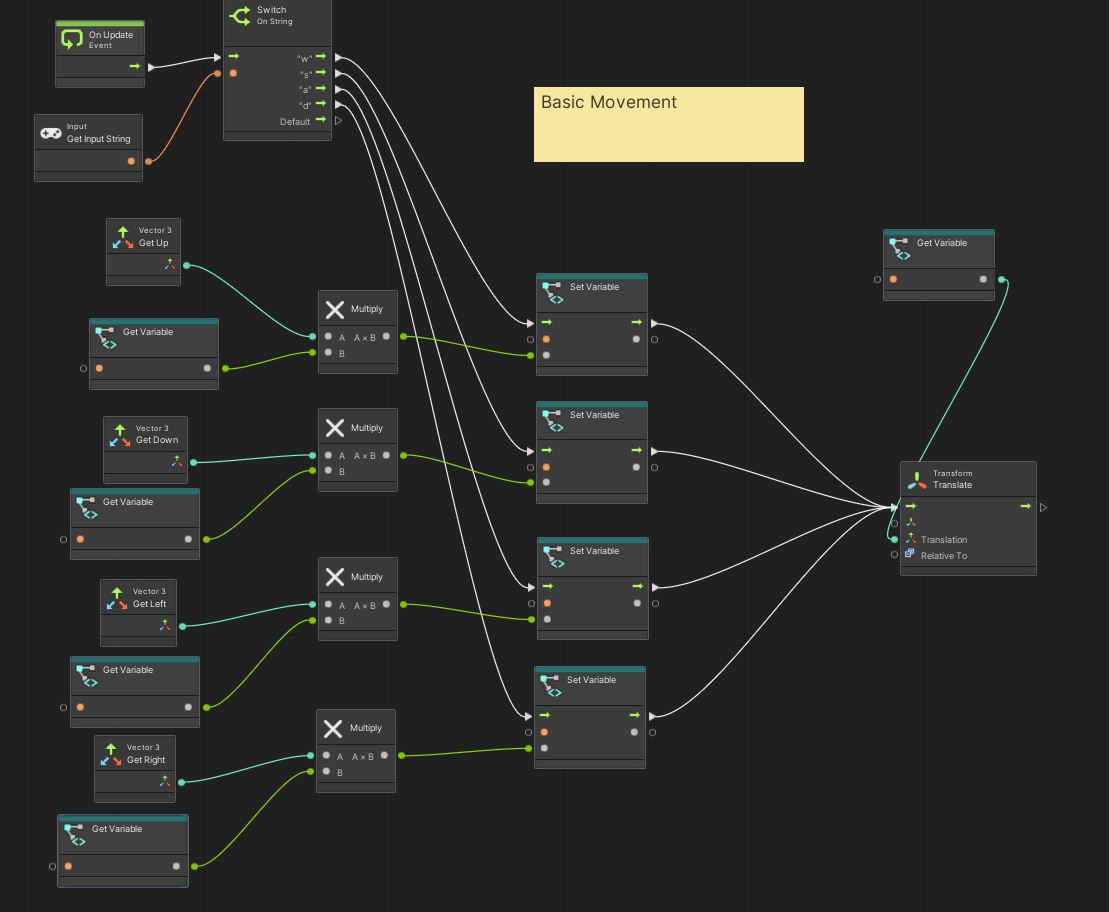
Creating Your First Script
Basic Concepts:
- Nodes: Represent actions or logic.
- Connections: Define the flow between nodes.
- Graphs: The visual representation of your script.
Simple Example:
- Create a new Visual Script.
- Add a Start Event node.
- Connect it to a Debug Log node to print a message when the game starts.
Does Unity Support Visual Scripting?
Unity officially supports visual scripting with its built-in tool, previously known as Bolt. Regular updates and an active community ensure that it remains a powerful and reliable option for developers.
Scripting Languages in Unity
Unity primarily uses C#, but visual scripting provides an alternative for those less familiar with coding.
Comparison Between C# and Visual Scripting:
- C#: More control, extensive libraries, requires coding knowledge.
- Visual Scripting: Easier for beginners, faster prototyping, but can be less efficient for complex tasks.
Making a Game with Visual Scripting
Step-by-Step Game Creation:
- Plan Your Game: Outline mechanics and features.
- Create Visual Scripts: Develop logic using nodes and connections.
- Test and Iterate: Continuously test your game and refine your scripts.
Practical Tips and Tricks:
- Start Simple: Begin with basic mechanics.
- Use Templates: Leverage pre-made nodes and scripts.
- Debug Visually: Use the graphical interface to trace and fix issues.
Game Development Without Coding
It’s possible to create entire games without coding, although there may be some limitations compared to traditional coding. Many indie developers have successfully launched games built primarily with visual scripting.
Is Unity Visual Scripting Free?
Unity Visual Scripting is included with Unity, meaning it’s free for anyone using the engine. Some additional assets or advanced features might come at a cost, but the core functionality is free.
Understanding Unity Visual Scripting
Name and Features: Unity Visual Scripting is the rebranded and integrated version of Bolt, offering a streamlined interface and enhanced features.
Evolution of Bolt: Originally a third-party tool, Bolt was acquired by Unity and integrated into the engine, enhancing its capabilities and support.
Scripting Backend in Unity
Definition and Options: The scripting backend refers to the technology used to compile and execute scripts. Unity supports multiple backends, including Mono and IL2CPP.
Choosing the Right Backend:
- Mono: Easier for debugging, faster iterations.
- IL2CPP: Better performance, suitable for final builds.
Bolt vs. PlayMaker
Comparison and Use Cases:
- Bolt: Great for general visual scripting, more versatile.
- PlayMaker: Focused on state machines, excellent for specific logic flows.
Which One is Better? It depends on your needs. Bolt is more versatile, while PlayMaker excels in specific scenarios requiring state machines.
Conclusion
Visual scripting in Unity opens up game development to a broader audience, making it possible to create complex games without extensive coding knowledge. By understanding and utilizing visual scripting, you can accelerate your development process and bring your game ideas to life.
FAQs
1. Can you make a game with Visual Scripting in Unity? Yes, you can create entire games using visual scripting in Unity, though some advanced features may still require traditional coding.
2. Is Unity Visual Scripting the same as Bolt? Yes, Unity Visual Scripting is the rebranded version of Bolt, now integrated directly into the Unity engine.
3. How do I play audio in Unity Visual Scripting? Import your audio files, create an audio source, and use nodes like Start Event and Audio Play to manage audio playback.
4. Is Unity Visual Scripting free? Yes, it is included with Unity and free to use, though some advanced assets may have additional costs.
5. Which is better, Bolt or PlayMaker? It depends on your project needs. Bolt is more versatile, while PlayMaker is specialized in state machine logic.


