

How to Export a Finished Unity Project
Exporting a Unity project can seem daunting, but with the right guidance, it becomes a straightforward task. In this comprehensive guide, we’ll walk you through every step of the process, from preparation to distribution. So, let’s dive into how you can successfully export your Unity project!
Understanding Unity Projects
Before we jump into the export process, it’s crucial to understand what a Unity project entails. A Unity project consists of various assets, scripts, scenes, and settings that come together to create your game or application. These components need to be properly managed and configured to ensure a successful export.
Preparing Your Project for Export
Preparation is key. Start by checking for errors in your project. Ensure that all scripts are functioning correctly and that there are no missing references or broken links. Optimize your assets by reducing file sizes where possible and ensure that your game runs smoothly.
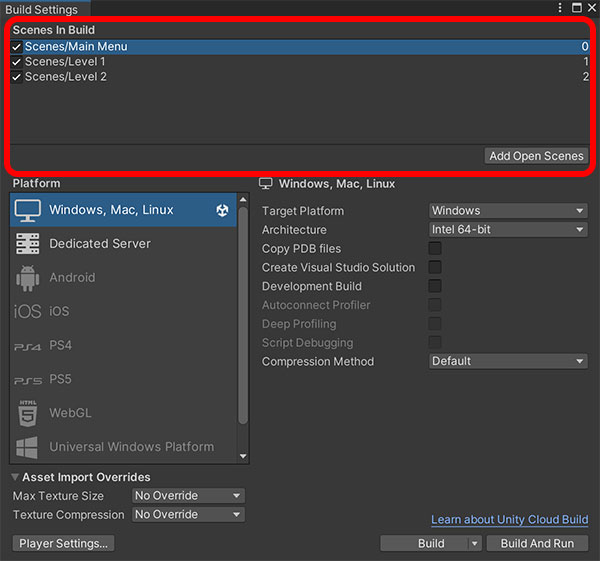
Configuring Build Settings
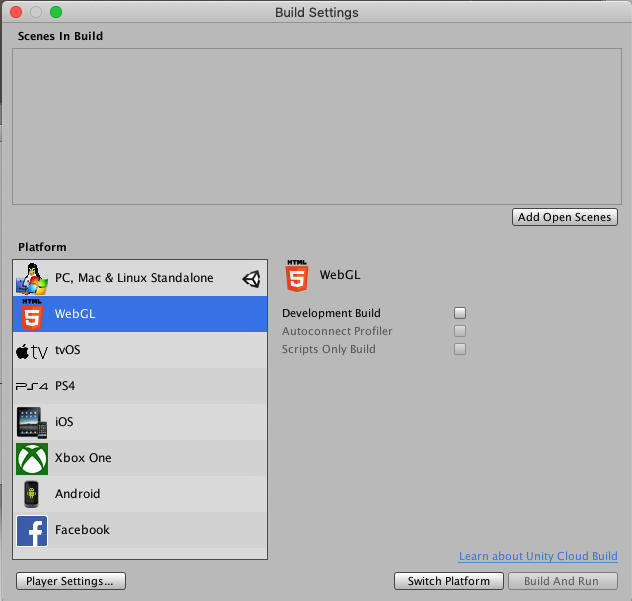
Unity offers a variety of build settings to tailor the export process to your needs. Here’s how to configure them:
Platform Selection
Choose the platform you want to export to. Unity supports multiple platforms, including Windows, macOS, Android, and iOS. Selecting the right platform is the first step in the build settings.
Configuring Player Settings
Player settings allow you to customize various aspects of your game, such as the resolution, icon, and splash screen. Navigate to Edit > Project Settings > Player to configure these settings.
Understanding Build Options
Unity provides different build options like Development Build, which includes debugging information, and Release Build, optimized for performance. Choose the one that suits your needs.
Exporting to Different Platforms
Let’s explore how to export to some common platforms:
Exporting to Windows
- Go to
File > Build Settings. - Select
PC, Mac & Linux Standaloneand chooseWindows. - Click
Buildand select the destination folder.
Exporting to macOS
- In the build settings, choose
PC, Mac & Linux Standaloneand selectMac OS X. - Click
Buildand choose your output location.
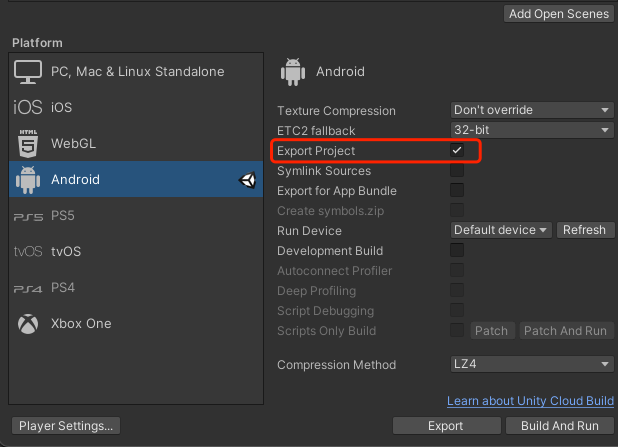
Exporting to Android
- Ensure you have the Android SDK installed.
- Select
Androidin the build settings. - Configure any necessary player settings specific to Android.
- Click
Build and Runto export and deploy the APK.
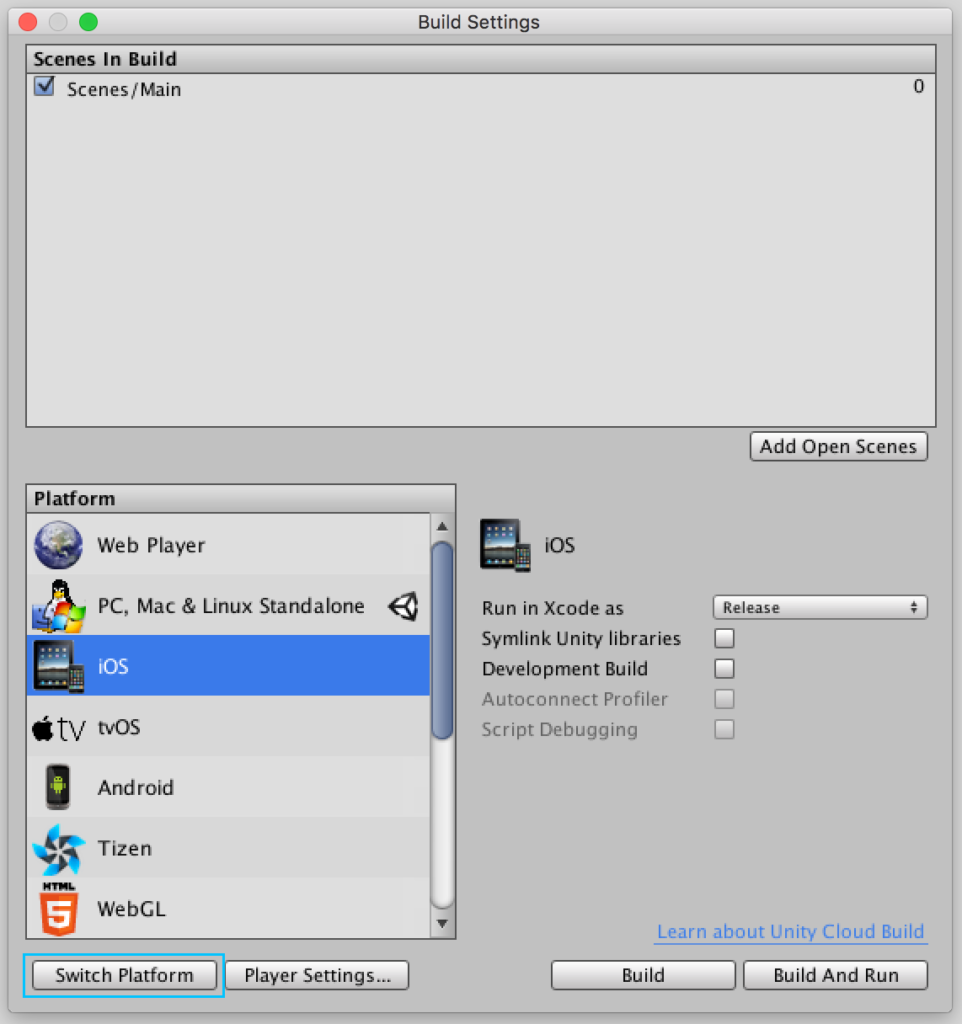
Exporting to iOS
- Install the iOS Build Support module.
- Choose
iOSin the build settings. - Configure your player settings.
- Click
Buildand then open the generated Xcode project to build and deploy.
Exporting to WebGL
WebGL allows you to run your Unity game in a web browser. Here’s how to export:
- Select
WebGLin the build settings. - Configure the player settings, focusing on optimizing for web performance.
- Click
Buildand choose your export location.
Advanced Export Options
For more advanced users, Unity offers custom build scripts and asset bundles. Custom build scripts allow for automated build processes, while asset bundles can optimize loading times by grouping assets.
Testing Your Build
Once your project is exported, testing it on the target platform is crucial. Run the build, check for any issues, and debug as necessary. Each platform may present unique challenges, so thorough testing is essential.
Optimizing Build Performance
Performance optimization can greatly enhance the user experience. Consider these tips:
- Reduce File Size: Compress assets and remove unnecessary files.
- Improve Load Times: Optimize scripts and assets for faster loading.
- Optimize Graphics Settings: Balance quality and performance to ensure smooth gameplay.
Distributing Your Build
After testing and optimization, it’s time to distribute your build. Package it appropriately for the platform, upload it to app stores or distribution platforms, and share it with testers and stakeholders.
Common Pitfalls and How to Avoid Them
Exporting a Unity project can come with challenges. Here are some common issues and solutions:
- Build Errors: Double-check scripts and dependencies.
- Performance Issues: Optimize assets and settings.
- Platform-Specific Bugs: Test on multiple devices and configurations.
Backup and Version Control
Always maintain backups and use version control systems like Git. This practice ensures that you can revert to previous versions if something goes wrong during the export process.
Updating and Maintaining Your Exported Project
Once your project is live, you’ll need to manage updates and feedback. Roll out updates carefully, and address bug reports promptly to maintain a smooth user experience.
Conclusion
Exporting a Unity project involves several steps, but with careful preparation and attention to detail, you can successfully share your game or application with the world. Start exporting today and bring your Unity project to life!
FAQs
How do I fix a build error in Unity? Check the console for error messages and resolve any issues in your scripts or assets. Ensuring that all dependencies are correctly set up can also help.
Can I export my Unity project to multiple platforms at once? Not directly. You need to configure and build for each platform separately due to differing platform requirements and settings.
What should I do if my build is too large? Optimize your assets by compressing images and audio files, remove unnecessary files, and use asset bundles to manage resources more efficiently.
How do I test my build on different devices? Deploy the build to various devices and platforms, using emulators and real hardware to ensure compatibility and performance.
What are some best practices for exporting Unity projects? Regularly backup your project, use version control, optimize assets, and thoroughly test on all target platforms to ensure a smooth export process.