
Introduction
Exporting FBX files from Unity might seem like a daunting task at first, but it’s a skill that can significantly streamline your workflow. FBX files are widely used in the industry for transferring 3D models, animations, and entire scenes between different software environments. Understanding how to export these files correctly from Unity will help you share your work more efficiently and integrate with other tools seamlessly.
Understanding FBX Files

What is an FBX File?
FBX (Filmbox) is a file format created by Autodesk for the exchange of 3D assets. It is highly versatile and can store a variety of data including models, animations, materials, and textures.
Common Uses of FBX Files
FBX files are used extensively in game development, film production, and virtual reality. They are particularly valued for their ability to preserve complex data and their compatibility with many 3D software packages like Maya, 3ds Max, and Blender.
Preparation Before Exporting
Organizing Your Assets
Before you start exporting, it’s essential to organize your project. Ensure that your models, textures, and materials are all properly named and structured within your Unity project. This organization will help you avoid confusion and errors during the export process.
Checking Compatibility
Not all assets are compatible with the FBX format out of the box. Verify that the models and animations you intend to export are suitable for FBX export. This might involve checking for non-standard shaders or ensuring that your models don’t have excessive polygons that could cause performance issues.
Installing the FBX Exporter in Unity
Step-by-Step Installation Guide
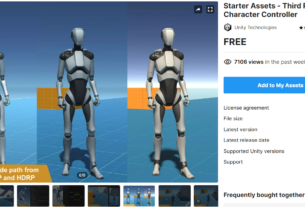
- Open Unity and go to the Asset Store.
- Search for the “FBX Exporter” package.
- Click “Download” and then “Import” to add it to your project.
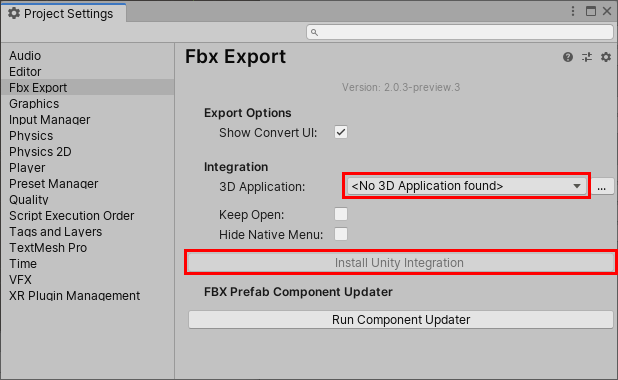
Verifying Installation
After installation, you should see new options in your Unity Editor for exporting FBX files. Navigate to File > Export to FBX to confirm that the exporter has been correctly installed.
Setting Up Your Scene for Export
Adjusting Scene Settings
Make sure your scene settings are optimized for export. This includes setting the correct scale, ensuring proper lighting, and verifying that all objects intended for export are visible and correctly placed.
Configuring Export Parameters
Before exporting, configure the export parameters according to your needs. This includes setting the output file path, choosing whether to include animations, and deciding on the level of detail for the export.
Exporting a Single Object
Selecting the Object
To export a single object, select it in the hierarchy or scene view. Right-click and navigate to the export option provided by the FBX Exporter.
Export Settings for Single Objects
In the export settings window, ensure that you have selected the appropriate options such as “Export Mesh” and “Include Materials”. Click “Export” and specify the location where you want to save the file.
Exporting Multiple Objects
Group Selection Techniques
For exporting multiple objects, you can either select them manually or group them under a parent object. Using the parent object method can simplify the process, as you only need to select the parent to include all its children in the export.
Batch Export Settings
In the export settings, make sure to check options that apply to all selected objects, like “Export all objects in selection”. Configure other parameters as needed and proceed with the export.
Handling Textures and Materials
Ensuring Texture Compatibility
Ensure that your textures are compatible with the FBX format. This might involve converting them to standard formats like PNG or JPEG. Additionally, check that all textures are correctly mapped to their corresponding materials.
Exporting Materials
Materials can sometimes be tricky to export correctly. Make sure to use standard shaders that are recognized by other 3D software. During export, select the option to include materials and verify their appearance in the exported file.
Animating FBX Exports
Exporting with Animations
If your objects have animations, ensure that the “Include Animations” option is checked in the export settings. Test the exported FBX file in a different software to ensure that the animations play correctly.
Troubleshooting Animation Issues
Common issues with animations include missing keyframes or incorrect rigging. Double-check your animation settings in Unity and ensure that all necessary data is included in the export.
Optimizing FBX Files for Performance
Reducing File Size
Large FBX files can be unwieldy and slow to work with. Reduce file size by lowering the polygon count of your models and compressing textures.
Maintaining Quality
While reducing file size, aim to maintain the quality of your assets. This might involve finding a balance between texture resolution and compression levels.
Common Errors and Fixes
Troubleshooting Export Issues
Common export issues include missing textures, incorrect scaling, and failed exports. Double-check your export settings and ensure that all dependencies are correctly linked.
Solutions to Common Problems
If you encounter persistent issues, consult Unity’s documentation or seek help from online forums. Often, updating Unity or the FBX Exporter can resolve unexpected problems.
Testing Your Exported FBX Files
Importing into Other Software
After exporting, import your FBX files into the target software (e.g., Maya, Blender) to verify their integrity. Check for issues like missing textures or incorrect animations.
Checking for Consistency
Ensure that the exported assets look and behave as expected in the new environment. This might involve tweaking settings or re-exporting if necessary.
Advanced Export Techniques
Using Custom Scripts
For more control over the export process, consider using custom scripts. Unity allows you to automate and customize exports via its scripting API.
Leveraging Unity’s API
Unity’s API offers extensive options for customizing the export process. Explore the documentation to learn how to tailor the export to your specific needs.
Best Practices for FBX Exporting
Tips from Industry Experts
- Always backup your project before exporting.
- Test exports frequently during development.
- Keep your project organized to avoid export errors.
Do’s and Don’ts
- Do use standard shaders and materials.
- Don’t include unnecessary assets in your export.
- Do test your exports in different software.
Conclusion
Exporting FBX files from Unity can greatly enhance your workflow and open up new possibilities for your projects. By following these steps and tips, you can ensure smooth and efficient exports every time. Practice makes perfect, so keep experimenting and refining your process.
FAQs
1. Can I export animations with my FBX file?
Yes, you can export animations. Ensure that the “Include Animations” option is checked in the export settings.
2. Why are my textures missing after export?
This often happens if the textures are not correctly linked or if they’re in an incompatible format. Ensure all textures are properly mapped and use standard formats like PNG or JPEG.
3. How do I reduce the size of my FBX file?
You can reduce file size by lowering the polygon count of your models and compressing textures.
4. What if my export fails?
Check for common issues like incorrect scaling or missing dependencies. Updating Unity or the FBX Exporter can also resolve many issues.
5. Can I automate the export process?
Yes, you can use Unity’s scripting API to create custom scripts that automate and customize the export process.